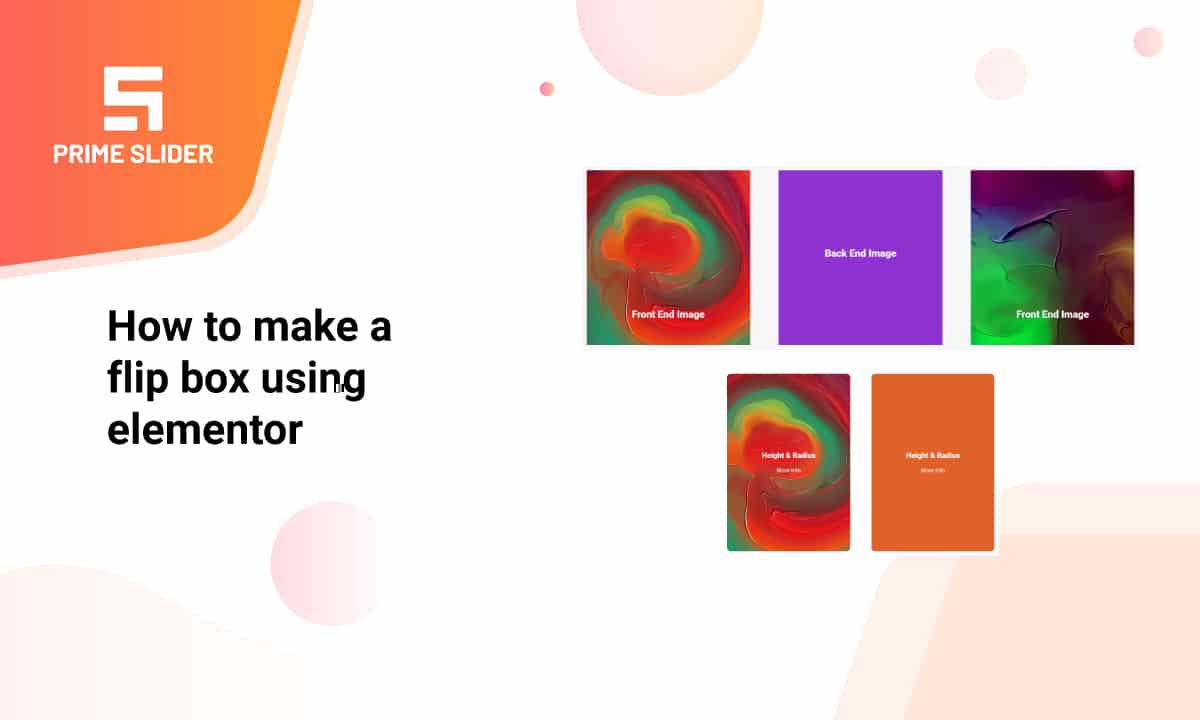
How to make a flip box using elementor
Flip Box is an awesome way to add flipping content on your website. To add a modern and fresh look on your site, you can make a flip box using elementor easily.
Making a Flip box is easy. Normally you put images, content, icons, and more on a box-shaped window. The box shape flips if you hover your mouse over it. Both the flipping sides can hold a specific set of content inside. This particular box is your Flip box.
In this blog, we will show you how you can make a flip box on your website using elementor in seconds. Of course, as a busy buddy, you would want to avoid codes as much as we do. So, we will be using a widget from a popular addon named Element Pack. In case you don’t know what it does, please visit the page and take this blog as an example of what it has to offer.
Flip Box widget guide line
The Flip Box widget by Element Pack is one of the most optimized and user-friendly widget on the market. Generally, you will get the hang of it on your first use. Still, things become complicated if the right functions are not mentioned. So, we will show you how you can utilize this widget to make a flip box on your website.
Inserting widget- easy as pie!

First, drag and drop the Flip Box widget by Element Pack on your page. It’s not necessary to add any section beforehand for a new page. But if the current page already has contents, please make a suitable section first and then add the widget inside.
Front end
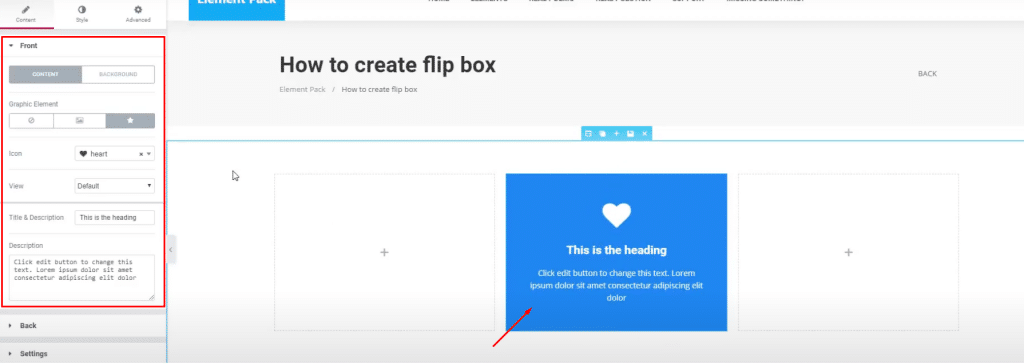
The first section you will see would be the Layout section under Content tab. This is the place where you can add content to your flip box. Be it image, text, or icon, you place the in this section with a designated title and excerpt. Note that, you can change the background color into an image or any linear color.
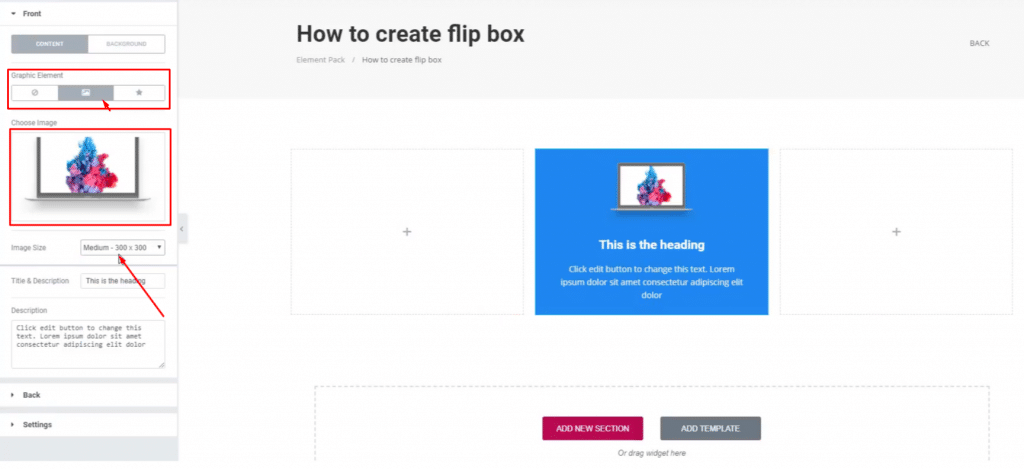
Clicking the Image icon from the marked menu will open another option to select the image you want to display here. Generally, you can choose any images you want and even have it as a full-sized according to the box. In that case, you need to insert the image as the background. That’s all.
Back end
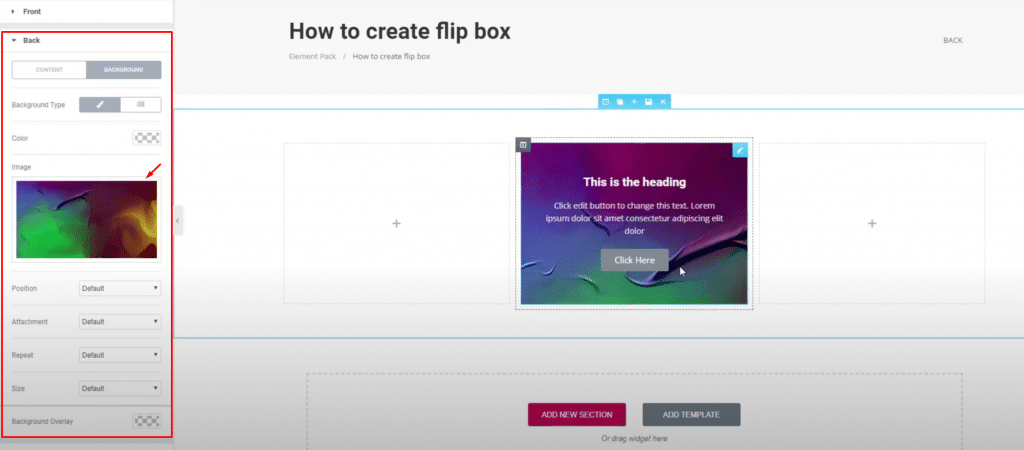
The back part of the flip box has a similar setup as the front part. The difference is, you can add a call-out button to it. However, you can’t add a logo or image as an item on the backside. Of course, adding an image as a background is possible.
Height and animation
If you are thinking about adjusting the size or animation of the flip box, you can do that easily. The section Settings holds the options to do that. Just follow the image below.
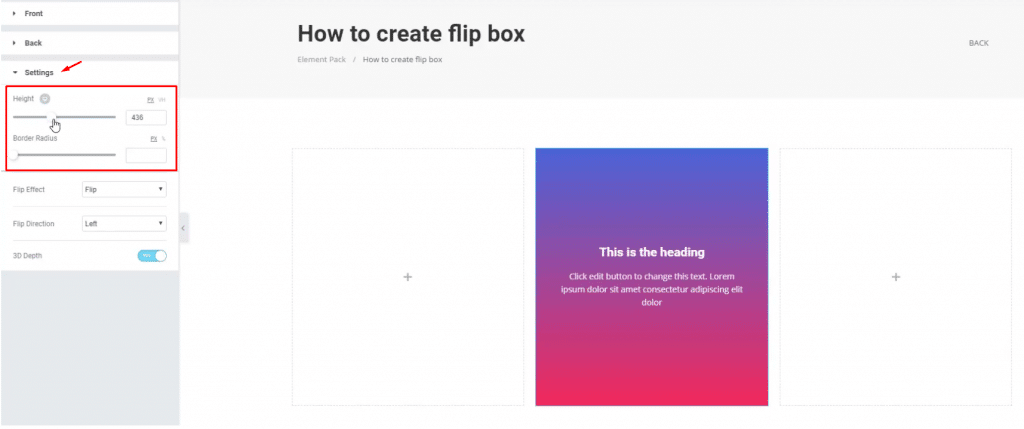
Adjustments should be made according to your taste in style and appearance. To make your visitors comfortable, go with a minimum height for the flip box where it’s easy to view the inner content.
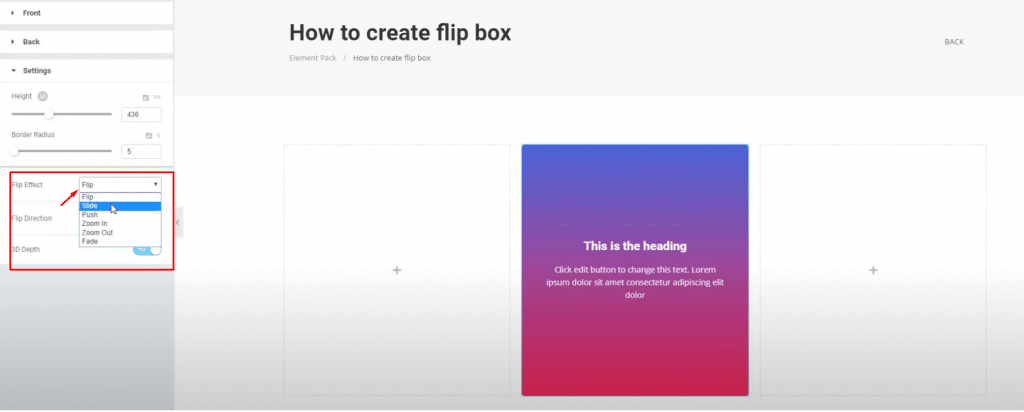
The animation part is one of the most crucial things. As you can see, the Flip Box widget by Element Pack lets you choose from 6 different animations presets. Isn’t it awesome?
Note that, we have skipped the Style tab on this blog. Because we want you to use your creative skills to make something out of the box. Still, we made a through and through the tutorial so that you can easily work it out.
Visit this blog for the tutorial.
Conclusion

Making a flip box is easy but has a lot of appeal to catch visitors. Many websites are using it to increase their conversion rate through super fast information delivery technique. We hope that, as you have read this blog, you can make your own flip box from now on.
This blog is brought to you by Prime Slider, a leading ready-page slider for Elementor.
Fell free to comment down below. Thank you for reading this blog.